Using Rize Effectively
The best way to use Rize is simple: track in the background, review quickly, and teach the system
The teams that get the most value from Rize do not treat it like a timer app. They set up structure first, review suggestions daily for a short period, and let the system learn. This guide is optimized for agency team admins first, with notes for freelancers and solo operators where the workflow differs.
The core workflow
Install Rize and turn on the right tracking inputs
Install the desktop app, browser extension, and any calendar or task integrations you need. Good input data is the foundation for good suggestions.
Create your data model
Set up the clients, projects, tasks, and rules your team actually uses. If the structure is messy or incomplete, the AI has fewer good options to tag against.
Let Rize track work in the background
Rize captures active-window metadata and creates live time entries as you work. When you switch contexts, entries are finalized into AI suggestions with descriptions and tag recommendations.
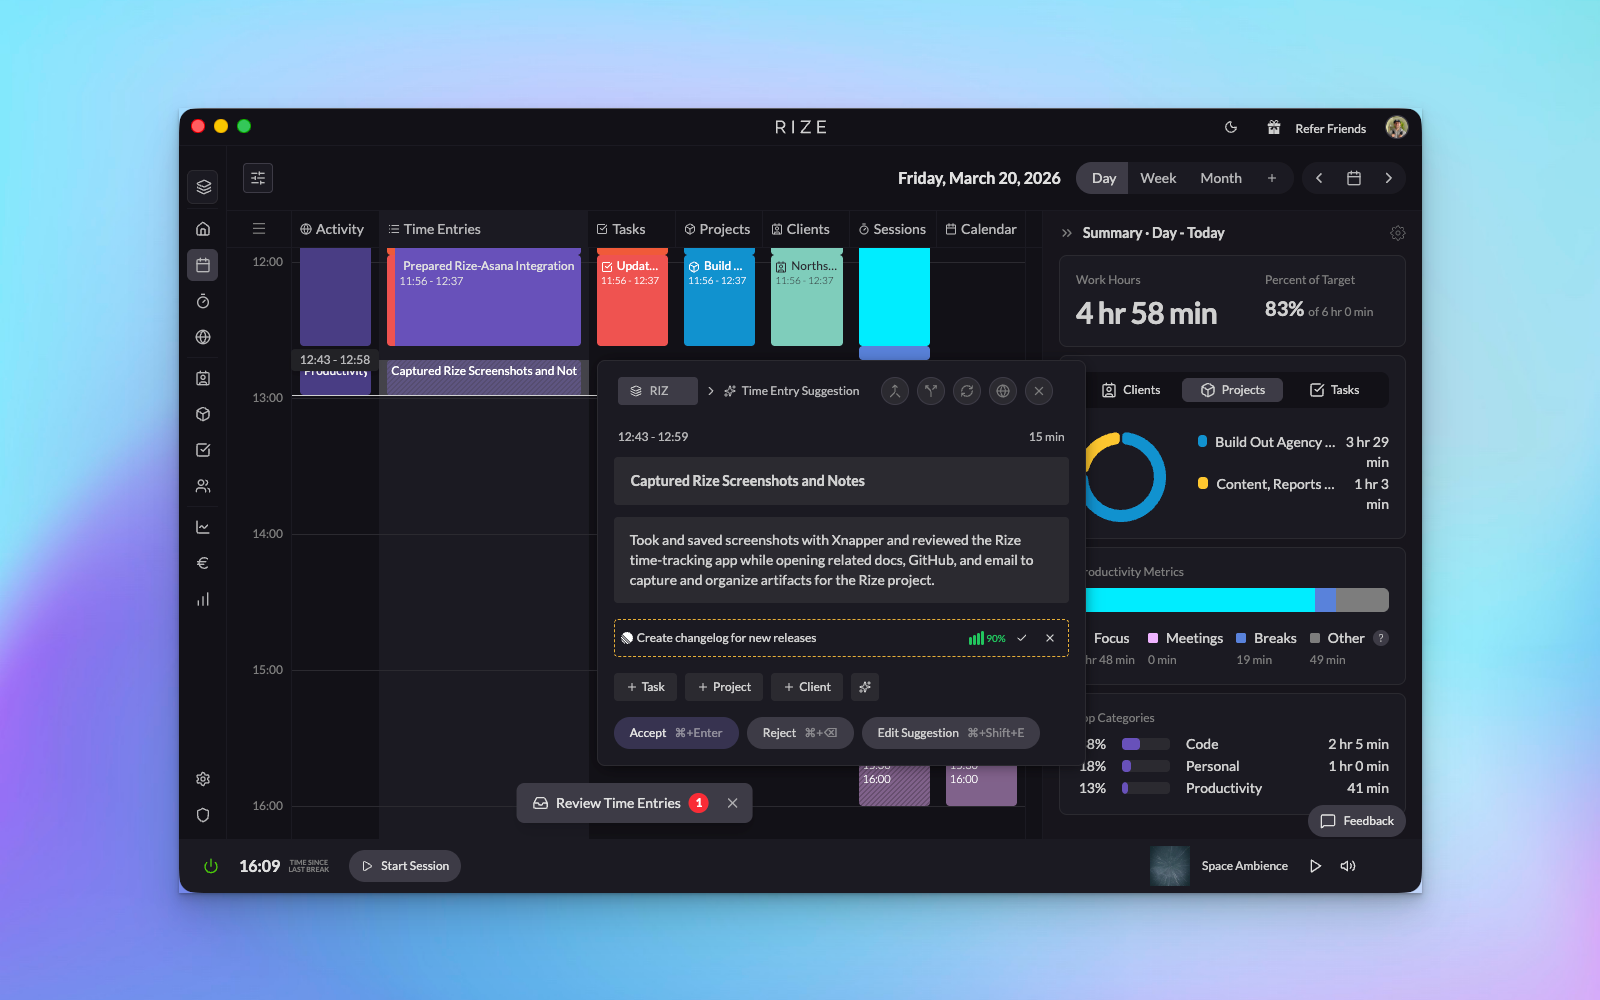
Review and correct time entries daily
Click an entry on the day calendar to open the Review Panel. Accept what is right, fix what is not. Those corrections are the fastest way to improve future suggestions.
Use clean data for reporting and profitability
Once the tagging workflow is stable, dashboards, reports, billable settings, budgets, and profitability become much more useful and trustworthy.
For agency and team admins
1. Set expectations before inviting the team
- Explain that Rize tracks metadata only: app name, window title, URL, and timestamps.
- Make it explicit that Rize does not take screenshots or record keystrokes.
- Decide who will own workspace setup, billing settings, and integration management.
2. Configure the workspace before rollout
- Create the workspace and invite the right members.
- Choose a billing strategy and set default rates or cost model.
- Connect ClickUp, Linear, or Asana before asking people to rely on auto-tagging.
- Add shared clients, projects, and tasks so the AI has real targets.
3. Prioritize tagging accuracy in the first week
- Review entries via the Review Panel on the day calendar every day.
- Add keywords and tracking rules when recurring patterns show up.
- Use synced tasks from your task tracker instead of relying on free-text work where possible.
- Adjust custom instructions and AI confidence settings once you have a feel for the current quality.
4. Move into admin reporting
- Review client, project, and member-level data.
- Set budgets, billable rules, and profitability inputs.
- Build dashboard views for utilization, pending time, client health, and workload allocation.
For freelancers and solo operators
- Create clients and projects early, even if the list is short.
- Use tracking rules and keywords to help Rize distinguish overlapping work.
- Review entries via the Review Panel daily until suggestions become dependable.
- Use reports and exports to make invoicing easier without rebuilding your week from memory.
What “good setup” looks like
Accuracy is improving each day
Suggestions increasingly arrive with the right client, project, and task because your rules, task sync, and corrections are reinforcing each other.
Reports are usable without cleanup
Team admins can trust dashboards, profitability views, budgets, and exports because time is landing in the right place consistently.
Review is quick, not painful
People are spending a few minutes reviewing instead of reconstructing hours of work from memory or filling in manual timesheets at the end of the week.
Adoption stays high
Team members understand the privacy model and see Rize as a helpful automation tool rather than a monitoring tool.
If your goal is better auto-tagging, the most important habit is to review and correct suggestions quickly. Rize gets better when the feedback loop is tight.
Best next steps
- Tracking Overview for privacy, schedules, live tracking, and tracked data.
- Suggestion Review Panel for the new calendar-docked review experience.
- Time Entry Suggestions Settings for the main accuracy controls.
- ClickUp Integration, Linear Integration, and Asana Integration for task sync.
- Profitability Overview if you are rolling this out for billing, budgeting, or utilization.